Hey,
Here is a guide on how to implement glows on the latest version of Houdini.
NOSTALGIA REPO: GitHub - solero/nostalgia: Classic private server features for Houdini · GitHub
REQUIREMENTS:
- Houdini should be already installed and setup either on a localhost environment or a VPS with wand.
The current glows.swf file provided in the repo supports name glow, name color, bubble color, bubble text, bubble glow, speed, mood text, mood color, ring color, snowball color, rainbow colored text and names, transparent penguins, rotation, walk on walls and penguin size.
1. Injecting the glows safely through the dependencies.
First of all, you must get the dependency file called glows.swf found in the repo.
You then want to place this file in the client folder which is in the directory /legacy-media/play/v2/client.
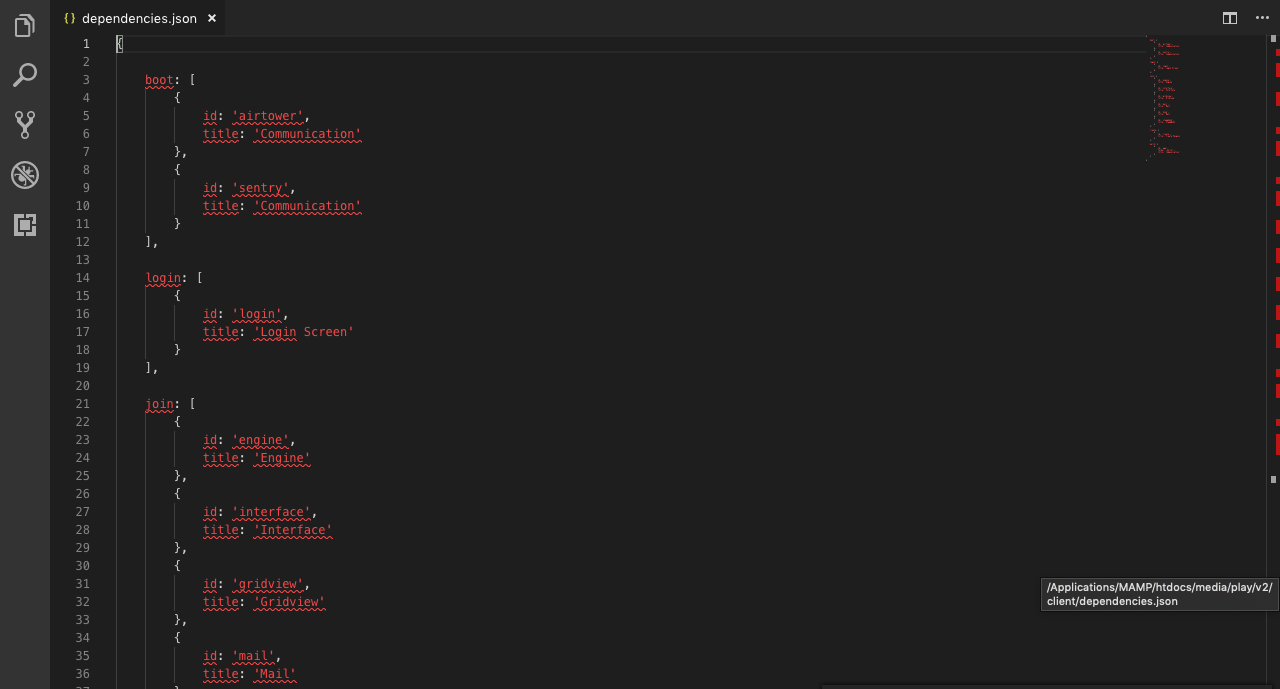
We need to make sure the file is loaded when the client loads, so that the glows can be added onto our penguin. First head to the client folder, which is in the directory /legacy-media/play/v2/client. In that folder you should find a file called dependencies.json.
We’re going to add an entry for our new glows dependency.
Once you open the file, you should see this:
Look out for the lines:
{
id: ‘stampbook’,
title: ‘StampBook’
},
Underneath the bit where it says },
We are going to add our entry for the glows dependency, as you can notice most of these entries already in here are files from the client folder, specificially the id is the file name, e.g. interface entry is for interface.swf, mail entry is for mail.swf, gridview is for gridview.swf.
Since our glows.swf file is in that client folder and we WANT it to be loaded, we want to create an entry with the id: ‘glows’ since that’s our file name, you may of named your file name differently so adjust it accordingly to whatever you renamed your swf file.
So under }, we are going to add our entry:
{
id: ‘glows’,
title: ‘glows’
},
Then we want to save the file.
NOTE: Those with their CPPS under CloudFlare must clear their cache ON CloudFlare, by navigating to CloudFlare’s panel, going to the cache tab and selecting purge all cache. Then you must clear your own browser cache, whether it’s hosted under CloudFlare or not.
4. Adding the plugin to Houdini
We then want to get the plugin file called __init__.py found in the repo. Rename the file to i.e. glows.py or a name of your choice and then place the file in the plugins folder of Houdini (/houdini/houdini/plugins).
5. Enabling Permissions
By default, the plugin only lets those with the nostalgia permission use the commands to change their glow. You may want to only give yourself or certain players permissions or you may want to give everyone permission.
To give certain players permissions to use certain commands i.e. if you wanted to give a player with the ID 109 permission to use the ring color command, you would add an entry in penguin_permission where the penguin_id is 109 and the permission_name is nostalgia.ringcolor.
To give certain players permission to use all commands i.e. if you wanted to give players 102, 104 and 106 permission to use all the glow commands, you’d add an entry in penguin_permission for IDs 102,104 and 106 and name the permission_name as nostalgia (which allows all commands in the file for them)
To give everyone permission for a command, remove the line @permissions.has_or_moderator() from the commands you wish anyone to use.
To increase the range of size (by default its limited between 1 and 500), edit the line that says if '|' not in speed and int(speed) in range(1, 500): and change 500 to the amount you wish for.
Be sure to refer to Solero’s discord or leave a reply if you are stuck on anything.
~ ro